

If you have ever opened a new set of hair clippers and stared at those numbered plastic attachments, you already know that feeling of hesitation. Understanding clipper guard numbers is the foundation of every great home haircut — whether you are going for a simple buzz or trying to understand taper vs fade styles. This guide will show you exactly what each number means, how long it cuts, and which guard to pick every single time.
What Are Clipper Guard Numbers?
Those numbers on your clipper attachments are not random. They are a simple system that tells you how much hair will be left on your head after a single pass. The smaller the number, the closer the blade gets to your scalp, which means shorter hair. The system exists to give you full control, so you never have to guess.
Most home clipper kits include guards numbered from 0 to 8. Each one represents a specific cutting length that barbers and home users rely on every day. Once you understand the map, every haircut becomes predictable and stress-free.
How Do Hair Clipper Guards Work?
You might think the clipper blade does all the work, but the guard is the real hero behind a consistent haircut. A guard is a plastic or metal comb that snaps onto the blade and creates a fixed distance between the cutting teeth and your skin. Without any guard attached, the blade cuts almost down to the scalp, leaving a very short stubble effect.
When you add a guard, you lift the blade away, and that gap controls the final hair length. The guard does not slow the blade or change its power. It only decides how much hair can enter the cutting path. The taper lever on the side of many clippers can also fine-tune the length slightly, even without swapping guards.
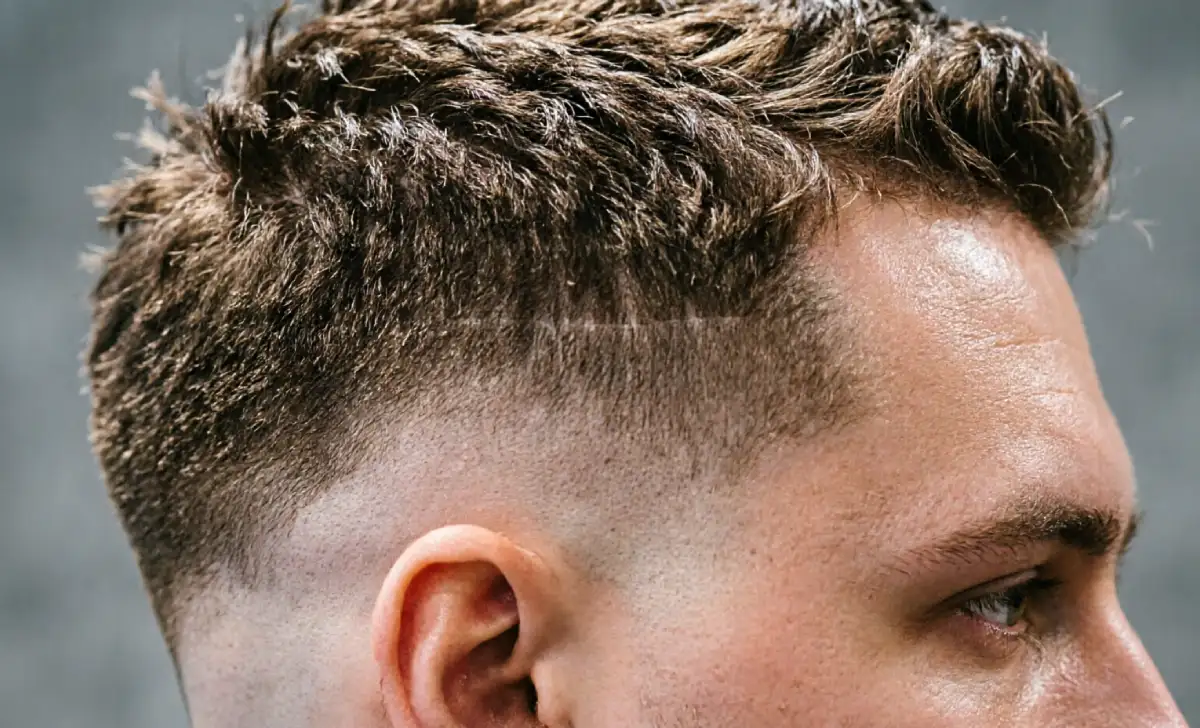
Clipper Guard Numbers 0–8 Length Chart

The number 0 guard leaves almost no visible hair, typically around 1.5 mm or less than 1/16 of an inch. This is the closest you can get to a bald look without shaving. It is the top choice for tight skin fades and clean edges around the ears.
The number 1 guard cuts to about 3 mm or 1/8 inch, giving a classic shadow of hair that still shows plenty of scalp. The number 2 guard takes you to roughly 6 mm or 1/4 inch, where hair starts to look intentional. A number 3 guard leaves around 10 mm or 3/8 inch, perfect for neat military-style crops.
Once you reach number 4, you are looking at about 13 mm or 1/2 inch. This length works beautifully for soft crew cuts and the beginning of a fuller style. The number 5 guard leaves roughly 16 mm or 5/8 inch, thick enough to run your fingers through.
A number 6 guard gives around 19 mm or 3/4 inch, and a number 7 delivers about 22 mm or 7/8 inch. Both are great for longer buzz cuts that still hold their shape. The number 8 guard, the longest in most standard kits, cuts to approximately 25 mm or 1 inch. Keep in mind these measurements assume the taper lever is closed; opening it adds roughly 0.5 to 1 mm.
What Does Each Guard Number Mean?
If the numbers feel abstract, think about what each one looks like on an actual head. A number 0 or 1 leaves stubble you can barely grip, and it reveals the scalp clearly. These lengths are bold and sharp with zero maintenance needed.
Guards 3 through 5 sit in the zone many barbers call “clean but not bald.” You can still see the shape of your head, but the hair softens your features. This is the classic summer cut, the easy dad look, and the style that says you care without overthinking. Guards 6 through 8 let your hair fall naturally, which is ideal for a styled top or a slightly textured finish.
What Length Is a Number 4 Clipper Guard?
The number 4 guard sits right in the sweet spot of versatility, which is why so many people search for this specific measurement. With the lever closed, a number 4 guard leaves roughly 13 mm or 1/2 inch of hair. If you open the taper lever all the way, that length can stretch closer to 14 mm, just enough to notice if you look closely.
What makes the number 4 so popular is how forgiving it is. It is short enough to look neat, yet long enough that it does not reveal every contour of your scalp. You can wear it as a uniform buzz cut or blend it with shorter guards on the sides for a subtle fade.
Are Clipper Guard Numbers the Same Across Brands?
If you have ever used a Wahl guard and then tried an Andis guard of the same number, you might have noticed a slight difference. While the numbering systems are very similar, they are not perfectly identical down to the millimeter. For example, a Wahl number 4 guard typically cuts to around 13 mm, while an Andis number 4 can be closer to 12.5 mm depending on the model.
These differences exist because each brand engineers its guard teeth and blade alignments slightly differently. If you are using multiple clipper brands or a universal guard set, always take a test pass on a small section first. The variation is small, often just half a millimeter, but that can matter when you are aiming for a seamless finish.
Clipper Guard Sizes for Fades and Tapers
A great fade depends on choosing the right guard numbers in the right order. You will typically start with the smallest guard near your neck and ears, then step up one guard number at a time as you move upward. If you want to explore full style ideas, check out the different types of fades to find the right look before you pick your guard sequence.
A common fade progression might use a number 0 at the baseline, blend into a number 1 about an inch higher, then a number 2, and finally a number 3 or 4 at the top. The taper lever is your secret blending weapon. By opening it slightly while using the same guard, you can blur the line between two lengths and get that smooth, professional transition.
How Do You Attach and Remove Clipper Guards Correctly?
Snapping a guard onto your clipper should feel secure, not forced. Hold the clipper with the blade facing up, align the bottom of the guard with the blade’s cutting edge, and push it forward until you hear a firm click. A guard that is not fully seated can wobble and leave uneven patches during your cut.
Removing a guard is just as important to do carefully. Grip the sides of the guard near its base, not by the teeth, and pull it straight off without twisting. Twisting is what snaps the small plastic tabs that keep the guard locked. Treat these attachments as precision tools, and they will outlast your clippers.
Common Mistakes When Using Clipper Guards
One of the biggest mistakes beginners make is pressing the guard too hard against the scalp. The guard is designed to glide lightly over the skin, not dig in. When you push down with force, you compress the hair and end up cutting it shorter than the guard number suggests. Keep your touch light and let the clipper do the work.
Another common error is cutting against the grain right away with a very short guard. If your hair grows in a swirl or sticks out at an angle, jumping straight to an against-the-grain pass can cause snagging and an uneven finish. Start by going with the grain, then reassess before you flip direction. Many people also forget to clean guards between uses, which leads to clogged teeth and tugging.
Choosing the Right Guard for a Buzz Cut

The buzz cut is the ultimate low-maintenance style, but the right guard number still matters. If you have never buzzed your hair before, starting with a number 3 or 4 is the safest choice. These lengths leave enough hair to cover minor scalp bumps while still giving you a clean, uniform look. For a sharper, bolder finish that works well for younger styles, a boys’ fade haircut approach using a number 1 or 2 can make a strong impression.
For those who want the barest look without shaving, a number 1 delivers that tight, military-style finish. The decision comes down to how much scalp you want visible and how often you are willing to trim. Move the clipper slowly and overlap each pass slightly so you do not leave strips of longer hair behind.
How Do You Clean and Store Your Clipper Guards?
Cleaning your guards directly affects how well they perform on your next haircut. After each use, tiny hair clippings pack into the guard teeth, and if left there, they cause the clipper to pull and snag. Brush away loose hair with your cleaning brush, then rinse the guard under warm water and let it dry fully before reattaching.
Storing guards loosely in a drawer is a fast way to lose or crack them. Keep them in a small pouch or the original case, organized by number so you can grab the right one without fumbling. A little care here means your next haircut always starts clean and smooth.
FAQs
Can I use clipper guards on any hair type?
Yes, clipper guards work across all hair types, from straight to tightly coiled. Curlier or coarser hair can appear slightly shorter after cutting because of how it springs back. Start with a guard one number higher than your target and adjust from there.
Do clipper guard numbers change with cordless versus corded clippers?
The guard numbers themselves stay the same, but a cordless clipper with a low battery can tug at thicker hair. Always ensure your clipper is fully charged for the most accurate and consistent guard performance.
What should I do if my guard keeps falling off during a haircut?
First, check that it is the correct attachment for your specific clipper model. Also inspect the plastic tabs on the guard for cracks or wear. A stretched or damaged guard will never lock securely and should be replaced.
Is there a guard number higher than 8?
Some professional clipper lines offer guards above number 8, going up to number 10 or 12. For most home kits, number 8 is the maximum. Anything longer is usually achieved with a comb and shears or a separate trimming attachment.
Conclusion
Clipper guard numbers are not complicated — they are your personal map to a perfect haircut every time. You now understand what each number means in millimeters and inches, why a Wahl and an Andis might cut slightly differently, and how to move from a simple buzz to a smooth fade. The right guard is already in your kit. If you ever want to refresh your overall look, even a small change in length can help you look younger with the right haircut style. Pick your guard, trust your hand, and enjoy the kind of clean, confident result that only comes when you truly understand your tools.


")
")